How I Organize Back to School Forms

Back to School Ice Breaker Activity
As a 5th grade teacher, it's very important to get your students' attention on the first day of school and amp them up for a fantastic year, especially because in my school it's the last year of their elementary career. To do this, I have a great ice breaker activity that I like to do with my class; it's one that I did back when I did musical theatre as a kid in order to become more comfortable with our castmates.
On the very FIRST and very LAST day of school, I do this same activity. I even tell my students this when we get started. I have everyone arrange their desks in a huge circle and we each get a piece of lined paper and a writing utensil. Everyone writes their name on the very top of the paper. When everyone is ready, I say "pass" and we pass the paper to the left. Whatever name is on the paper that is in front of you, you have to write one positive thing about that person. Once everybody has written on the paper in front of them, I say "pass" and we once again pass to the left. A few important things during this activity - everyone is quiet and everyone must write something and it can only be positive.
After a lot of passing, the activity is over when you receive the paper back that has your name on the top. When you get it, you read all of the wonderful things that everybody had to say about you. I have my students put it somewhere special and safe where they can pull it out at any time if they are having a bad day. I usually suggest their pencil pouch. I keep mine in my desk. I know have 5 years worth of first day and last day papers of compliments and I still love reading them to this day.
The reason I have my students do this activity on both the first and last day is because it's amazing how much the comments change in that time. They go from being more superficial comments such as "I like your hair" to, "you really made me laugh all year long". The comments become more personal, and they are definitely more meaningful on the page that I receive back with my name on it. This activity can be just as important for us as teachers as it can be for our students. My students are usually harassing me by the last week of school about when we're going to do the activity from the first day.
For those of you who have students in upper grades, I definitely recommend this activity. It's a fantastic way to boost every student's self esteem on the first day, allow them to get to know their classmates, and to especially make any new students in the class feel welcome. I've only seen positive results with this and I hope that you can use it in your classroom.
Here's to a great new school year!


10 Things to Do BEFORE You Set Up Your Classroom
I'm not trying to pressure anyone into decoration madness,
and is well organized and attractive.
Keep only the books that bring you and your kiddos joy!
I LOVE children's books, too, but let's face it.
It's okay.
If you haven't used those foam Easter bunnies in the last 3 years, get rid of them.
Look at each one.
If no joy comes from having them and they serve no purpose,
pass them on to someone else or donate them.
It's a good feeling!
If you don't use them, someone else can.
If Czechoslovakia is still on your globe...you get it.
Share your treasures.
Oh, it's tough! I know it is. I've done it. But the feeling is just so great!
If you haven't used it or it turns your fingers purple...you don't need it.
Recycle that paper!
Once you decide what manipulatives and supplies you are going to keep, choose how you are going to store them.
Then label your supplies.
Labeling makes supplies easier to find for students and other adults who may visit.
Space saver!
Once the clutter is removed and you are ready to set up your room,
go online and play around with a classroom set-up tool.
You can design your whole room as many times as you like.
You'll need your room measurements for this.
Now you are ready to think decor!
Let me tell you, if I can do it, you can do it?
Did you see my mess above?
It doesn't look like that anymore.
This week, I can get in my building to work and I plan to make the most of it.
Pics to come on my blog!
Happy Tuesday!!

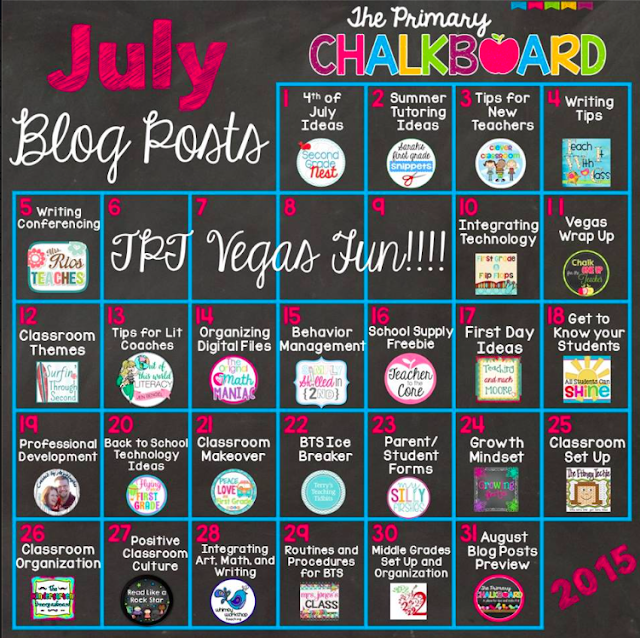
Don't forget! We're blogging every day this month at Primary Chalkboard!
Back to School IPAD Apps
Getting the Most Out of Professional Development
You hear it announced at the beginning of the school day and you dread it ALL. DAY. LONG! Or, you are happily enjoying your summer break and you get an email or text that makes your heart drop... PROFESSIONAL DEVELOPMENT SESSION- attendance "optional", but not really, if you know what I mean.
Yup, we have all been there before. I will admit that in my 15 years of being in the world of education, I have sat through some pretty crumby professional development sessions/classes where I felt I knew more about the topic being presented than the presenter. I was grouchy and didn't want to listen or hear what was being discussed!
On the flip-side of that, I too, have sat through many AMAZING sessions of professional development where I left inspired, invigorated, and ready to get the proverbial party started!
I have spent the past couple of weeks reflecting on this topic. I am now an administrator who will be giving these professional development opportunities to my staff. What made some sessions so amazing, and others so lame?
I realized it was ME! It dawned on me that I played a HUGE role in the value I got out of those professional development sessions. I also realized that there were some key components to getting the most out of each and every session- regardless of the topic, the presenter, or the time of day!
So, read on, dear PD'er! I am excited to share a few of these tips with you!
No I am not just saying this because I am a new principal. I have been a negative Ned most of my life. I tend to be very pessimistic about many things. However, I found that when I had a positive attitude, even if I had to "pretend" I was glad about the PD session, that I was more attentive and willing to listen to what was being shared. I tried to smile more in the session and remind myself that something in this presentation WILL make me a better teacher!
Also, be sure to avoid or shut down negative talk about professional development. A simple, "Really? I am looking forward to our meeting today!" is usually enough to get the negative Nellys and Neds to zip it!
I learned the value of this from my second principal- Jane Friel. She was a ROCK STAR at modeling for us as teachers things to do and try in our classrooms during PD sessions and Faculty meetings. Each year we would get a new composition notebook that had our name, grade, and year on it. Sometimes were "required" to take notes or reflect on the the learning of the meeting, but mostly it was a place to write down key ideas and take-away points from articles/presentations that were part of the on-going PD at that school. I still have all THREE of the ones I received while working in her school. Even better, I still flip through them from time to time and find the learning still relevant to me today!
I found that when I listened with the foreknowledge of wanting to write down the key ideas, I was able to focus and truly listen. It made a HUGE difference in my learning and understanding.
I have found that when I sit down, whether it is later that day or the next, with a colleague that also attended (or even one that didn't) and discuss key points, that I am able to better retain the information, get new insights from the person I am sharing with, and have a more positive experience overall. In fact, knowing that I will be sharing with someone else, makes me take better notes and ponder about ideas.
However, note that sitting next to your besties and talking off-topic the whole time will NOT be a helpful activity. Side-conversation is distracting to others around you and a real downer for the person presenting. To top it all off, it makes you look unprofessional as well- something we ALL want to avoid!
If no one wants to listen to you when it is all said and done, then write a Facebook post, blog post, share your ideas on Instagram, or even do a quick Periscope video- someone out there will listen and respond! I know I would!
GET REAL MR. HUGHES....
So, I want to make it clear that I understand that some professional development will just suck eggs. That's all there is to it! Sometimes the required topics are annoying- or "just another thing" we have to do. But, if we refer to Tip #1, we will find that regardless of the topic- something useful, positive, and constructive can truly come from ANY training, in-service, or session you are required to attend.
And, if the offering is optional- make it a point to go. Knowing you are there because you CAN be and not because you HAVE to be, will also make a huge difference in your attitude and learning.
Now that I have shared my TOP 3 TIPS for GETTING THE MOST OUT OF PROFESSIONAL DEVELOPMENT with you- it's YOUR turn! I would love to hear what tips you have to offer about how to get the most out of professional development! Leave your thoughts in the comment section below! I can't wait to hear from you! SCORE!
Thanks for stopping by and have a wonderful WEEK! WAHOO!
YOU ROCK-
John, Created by MrHughes

Getting To Know Your Students
check out my post at All Students Can SHINE.
You can also check out more posts from our fabulous authors here at the Primary Chalkboard.

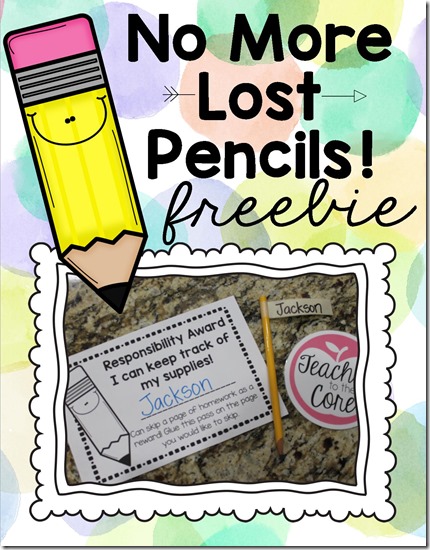
Helping students keep track of their pencils!
I don’t know about you, but kids not having the supplies they need to do their work drives me CRAZY! Crazy, I tell you. The problem is that I GIVE them everything they need. EVERYTHING and they lose it, eat it, leave it on the floor, claim, “It’s not mine!” and let their neighbor take it. So one kid has 6 pencils and another has none.
Enter Vodka.
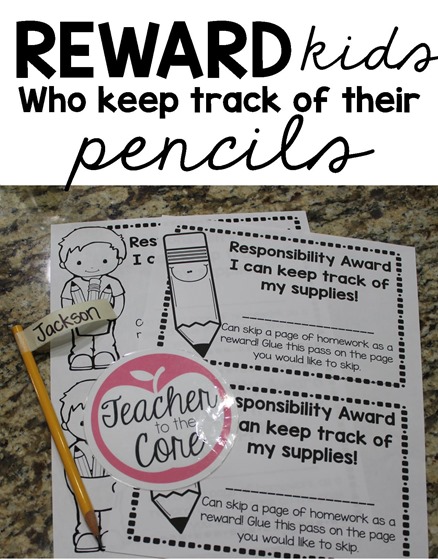
Actually enter this brilliant idea! I flag my pencils with masking tape, write the child’s name on the pencil flag, and reward the child for keeping track of their pencils until they are all used up.
So what are you waiting for? Grab some masking tape and let’s do this. Simply wrap tape around the pencil and fold the tape back in on itself. Trim the edge for a nice clean finish. This is a great job for a parent volunteer. I have used many kinds of tape to make the flags. I have found that masking tape works best. It’s easy to work with, write on, and though it can rip, it is pretty durable! I keep about 100 at the ready all the time.
 You can hand out the awards in many ways. I like to give a child an award when they use up a pencil. You can also surprise the class with a pencil check. Anyone who still has their pencil gets a responsibility award.


