Primary Chalkboard

Anchor Charts for ELA

Hello everyone! I am so excited to be back again blogging for The Primary Chalkboard! I feel like things are FINALLY becoming manageable again after the Back-to-School season…well, manageable at school. Definitely NOT manageable at home! With a football coaching hubby and 3 kiddos who are involved in after school activities 6 days a week, let's just say I am in dire need of a housekeeping and chef :)

But I digress. Today I wanted to talk about anchor charts. Anchor charts have been around a LONG time, before they had that cute name. I think the beauty of anchor charts is that they help kids remember things after the lesson. They are a constant reminder of past lessons and skills you want students to be able to use successfully and consistently. The problem, though, is that kids have to learn HOW to use these wonderful instructional tools. Simply placing them on the walls doesn't mean a transfer to your kiddos.

Bare Walls Do Not Equal Unprepared
I always start off my school year with pretty bare walls. Yes, it does pain me when I walk by and see beautifully decorated rooms all around me. And I do feel totally unprepared.  BUT, I do know that eventually my walls will be full and just as beautiful. It will just take some time. When I first began teaching, I would put so many charts on the wall that I wanted my kids to refer to, but the problem was that they weren't using the charts. I finally realized that in order to get my kids to USE the charts, we needed to create them TOGETHER. Otherwise the kids really don't have any idea what is on those charts, and what they are supposed to do with the information. And I realized that I could put EXACTLY what my kids needed on those charts. Bonus!

This year I am teaching 6th grade advanced ELA. So, it's really weird to only be focusing on ELA (even though I am pulling in science and social studies topics), but I have also found I am able to put so much more ELA info on my walls, I love it! We have been in school for about 6 weeks now, and my walls are slowly getting decorated. I decided that with my 6th graders, I want THEM to create the anchor charts….which is going very slowly! But I think it will be worth it in the end because they will have a sense of ownership.

Figurative Language Anchor Charts
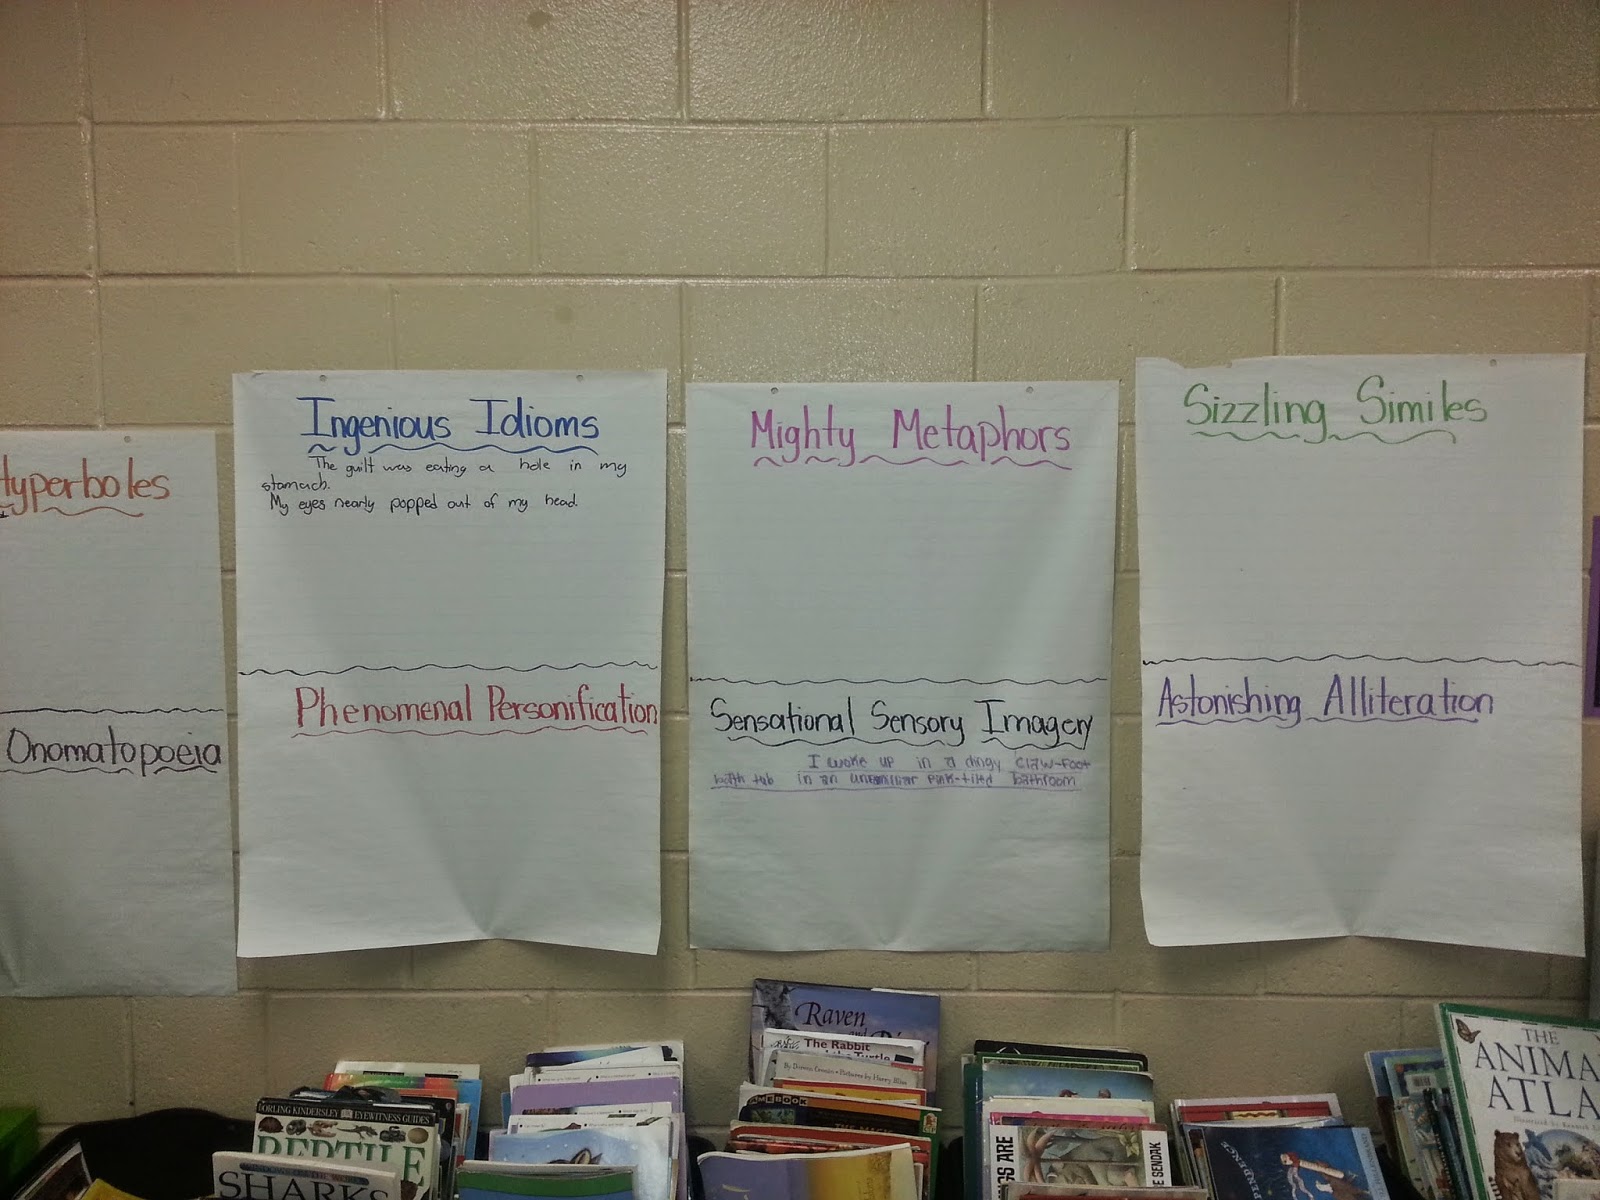
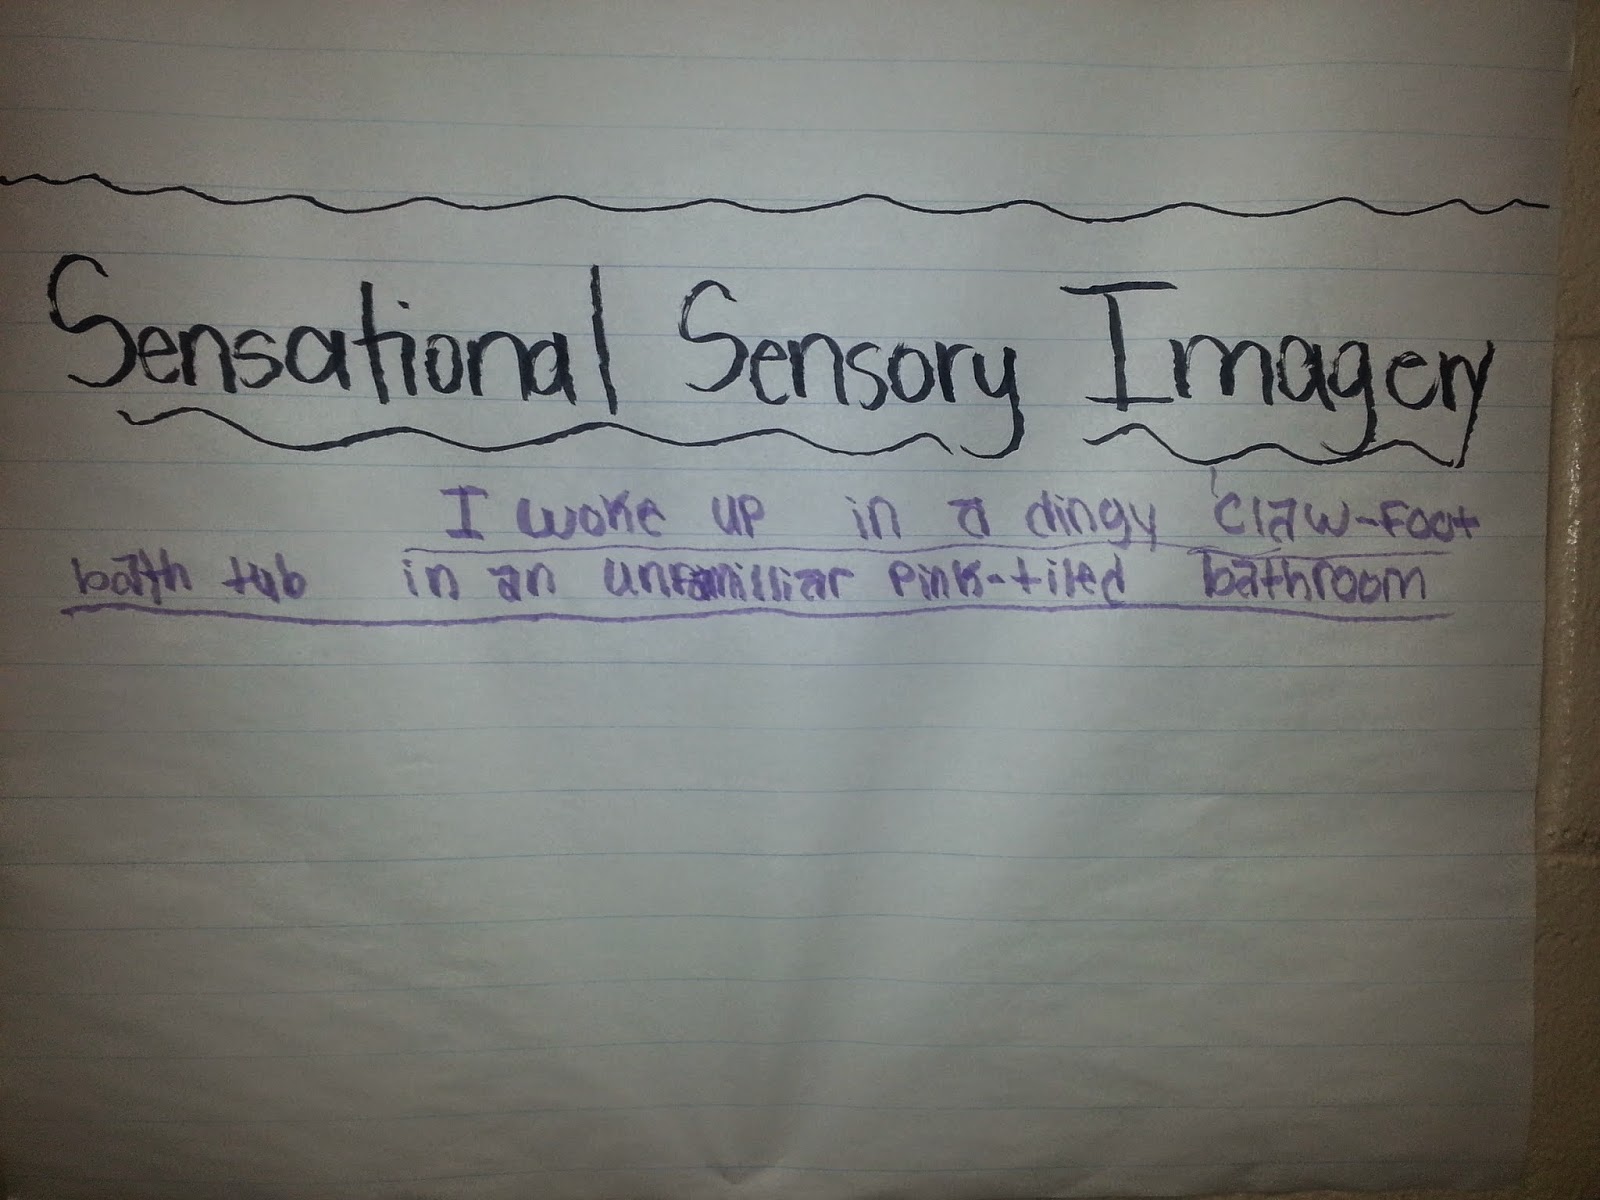
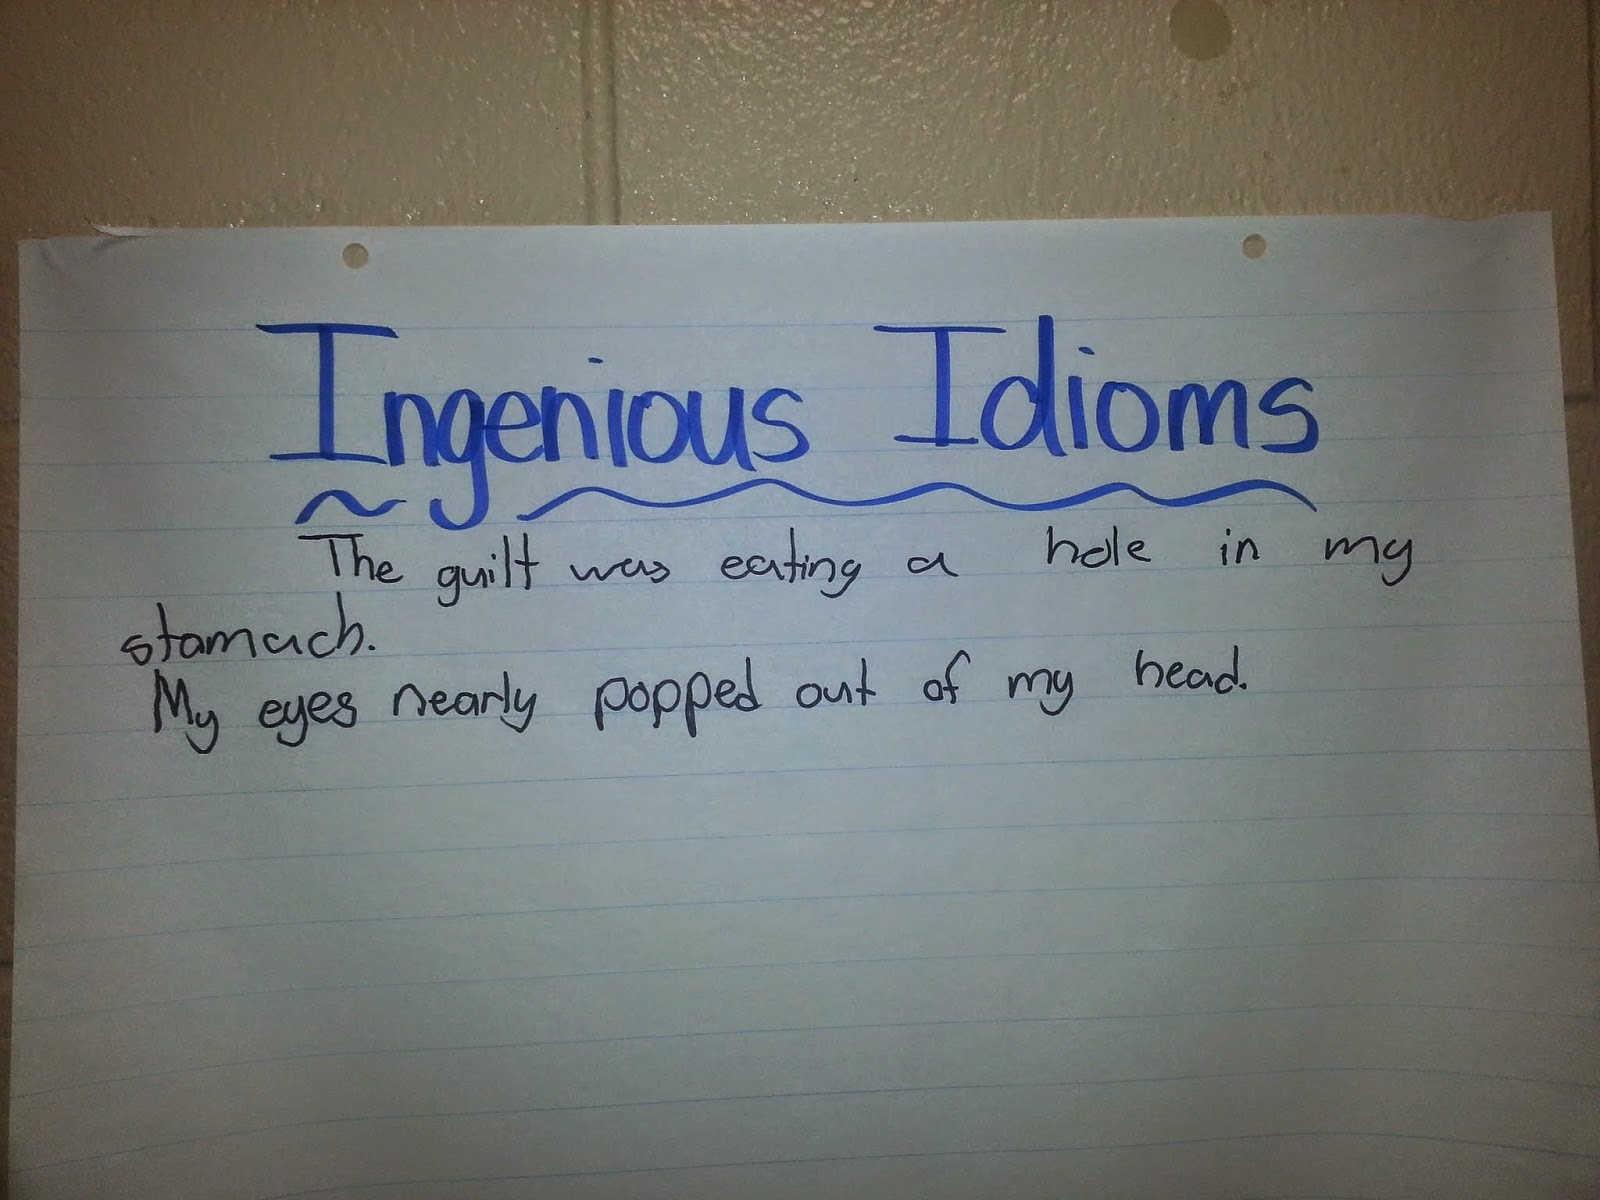
Our focus the first few weeks of school was figurative language. We spent about 3 weeks learning about the different types of figurative language and practiced revising our writing to include figurative language. I also had my students make this FREEBIE flapbook to put in their writing notebooks so they had a good reminder of each type of figurative language we studied. I also felt like my kiddos needed some visuals on the walls to serve as reminders to include figurative language in their own writing. I always tell my kiddos that one of the few times it's OK to steal is in writing. Not plagiarize, but the best way to improve as a writer is to read and model your own writing after those authors whom you admire and love. So instead of having creating a chart for each type of figurative language and writing examples of that type on it, I decided to leave the anchor charts bare except for the figurative language type.


I told my students that whenever they read a text and came across an AMAZING example of figurative language, they needed to write that example on the corresponding chart. This way they have a grab-bag of model sentences they can use in their own writing. They can snag an idea from these charts and tweak them for their own writing. I tell my students all the time that they need to take risks in writing, but usually it's not that they don't want to take a risk. It's just that they don't know HOW. I am hoping these charts will encourage my students to take a risk with using figurative language in their own writing. I will admit, the anchor charts are pretty bare still, but I am hoping that my kiddos will add to them as time passes.


I am also planning on adding an anchor chart for Grabber Leads, too, so that when students read an AMAZING grabber lead, they can write it on the chart. They can then write a similar grabber lead using the examples on the chart, if they need to borrow one. So many anchor charts, so little time!

Thanks for stopping by and reading my post. I would love to hear how you involve students in creating your classroom anchor charts! Until next time, happy teaching!

Heather


SitSpots, Math Facts Show Down, and Lines...OH MY!

      Okay, I have to be honest here- when I first heard about Sit Spots, I didn't think they would have any place in my 6th grade classroom. After all, my kids don't need to be reminded where to sit on the floor, and I didn't want them to be "toys". But, I decided to look at their product line anyways.

     As I browsed the Sit Spots shop looking at their line of products, I found these:


     You might asking yourself "WHAT ARE THOSE?"

     Just the COOLEST lines ever!!! These Sit Spot lines are vivid colors that the students can't miss. The custodian can vacuum over them, and they don't (at least they haven't YET) picked up dirt and mess. They have been down now for 20 days of school and they look brand spankin' new. My 6th grades tromp all over them.
     I placed these four lines where I needed the students to stay in place. Now, when we line up to go down the hall, the number of the day is told to line up on the red line. The other students line up behind. No more peeking in and out of the doorway, or goofing around. My 6th graders know exactly where to be!

     We also do activities at my SMART Board and before my lines, the students would tend to crowd the board. NOW, they don't because they have to stay behind the line or go to the end of it. ha ha. Works like a charm! Here are some examples:


     The blue and green ones that you see in the top picture are my Math Facts Show Down lines. We do math facts show down and that is where the two contenders must stand. For math facts show down, two students stand on the lines and I show them a math fact flash card. First one to say it get to the card and stays on my right (I stand facing the students). The non-winning student goes to the end of the line and the next student in line steps up to the green line. We do this until I run out of cards. The winner stays until he/she loses. At the end, the students count how many cards they have and we cheer!

     I can't tell you how much I love having these lines. I also got several other Sit Spots products that I will be using soon and will share how it goes with those as well.

Sit Spots offers a free sample to see if they will work in your room! WAHOO!
Click HERE to send for your free sample. Totally worth the time.

Thanks for stopping by-
John, Created by MrHughes


To find out more about me and my teaching ideas click below.
Pinterest     Facebook     Blog     Twitter     Instagram    


Differentiation and Engagement Using Math Centers

Aloha!  It's Corinna from Surfin' Through Second.  I just wanted to share a quick post today on how I use Math rotations in my class to meet all the needs of my students and keep them on task.


Our classrooms are filled with a variety of students from all walks of life.  We have our hands full and it's tough to keep all of our students on track and engaged especially during math.

I have set up math rotations in my classroom this year to make sure all students are getting the instruction they need and to make it fun and engaging.


Head over to my blog to see how I have set it up and run my math time in more detail.


Transforming a Simple Writing Lesson: How to Build a Sand Castle freebie

Hi everyone! It's Sarah from Sarah's First Grade Snippets. I've been back at school for two weeks, but this is a post I started working on over the summer. Trying to prolong summer, I guess! :)

Do you want a fun way to introduce or practice procedural writing? Do you want to shake up your writing workshop? Are you tired of kids saying "I don't know what to write"?
If you are nodding your head yes to any of these questions, then take the time to read through this post and watch my two videos!

I had this idea over the summer when my kids were playing in sand every day. My older son was trying to show my younger son how to make a sand castle. Of course my brain immediately went to a writing activity. Now I know sand in the classroom might sound like a total nightmare. But if you could swing it, think of how much fun it would be! PLUS, your kids wouldn't be able to say that they didn't know how to build a sand castle. It's the perfect way to introduce procedural writing. Sometimes you need to shake it up a bit!

There are two ways  you could set this up:

1. Bring actual sand into your classroom. (see option 1)

2. Watch a video of someone (me) showing step by step how to build it and turn it into an oral writing lesson. (see option 2 video)

Option 1: Bringing sand into your classroom: 


Click here or on the picture below to see a video of what this could look like:


Option 2: Bring (virtual) me into your classroom! 

Ha! Again, videoing myself is not exactly my favorite thing, but I do think this would be a good way to introduce a writing lesson. My friend Lisa (and fellow Chalkie) from Growing Firsties gave me this idea to have kids watch the video and then pause to talk about the steps of building the sand castle. If your kids aren't ready to do the actual writing, you could make this an oral writing lesson OR a shared writing lesson. As you watch, you have my permission to giggle at my cheesiness. :) 

Click here or on the picture below to watch the video.


With this option you don't have to bring sand into your classroom. The idea here is that your students can watch me make a sand "castle". As I show them the steps, pause the video to give your students opportunities to talk about the steps of making a sand castle. Then you could decide what your writing assignment will be: oral writing only, shared writing, interactive writing, or independent writing. 


There are 4 page options. You can download the writing pages here:


The big boxes could be for drawings. The little boxes could be for transitional words. The tall one is for more proficient writers to include an opening and closing sentence. 

If you got through this long post and actually watched both videos, thank you! I hope you can use something from this post! Enjoy:)

Come visit me over at my blog:


Interactive Edits: Tips for Teaching Grammar and Mechanics

Hello again friends!

This is Jen from Out of This World Literacy.  I am excited to share my latest thinking about interactive edits.  In the past, I have used D.O.L. (Daily Oral Language) worksheets in my classroom in the hopes that my students would correct all the mistakes in poorly written sentences.  I hoped, that by knowing how to correct numerous errors in poorly written sentences, they would be able to write correctly themselves.

My thinking completely shifted when I learned about Jeff Anderson and his idea of showing students well written sentences, rather than putting poorly written sentences in front of them.  If you ever have the opportunity to hear Mr. Anderson speak, TAKE IT!  He is phenomenal...and highly entertaining I might add.

Here he is explaining his thinking about inviting students to notice well written sentences:


     Asking students to notice what works well in a sentence, rather than to identify errors, helps students learn good grammar and mechanics.  When we practice finding mistakes, we only focus on mistakes.  When we practice finding what is good, we are focusing on what works well in sentences.  Since we want our students to write sentences full of strong grammar, mechanics, word choice, figurative language, etc., we will look at good quality sentences that model these traits.   

     After all, we don’t teach math by showing students how to find the wrong answers, or all the ways they could solve problems incorrectly.  We teach math by showing students many different ways to find the right answer.  Likewise, we rarely chose a poorly written book as a read-aloud.  And we certainly would not pick a lousy piece of work and use it for mentor text in writing.  We choose well-written work that models good writing.  Let’s do the same through interactive edit by choosing well-written sentences that give students the opportunity to notice what makes a great sentence!
   
    Here is a short video of our home school classroom, where my daughter Sophie helps us notice what works in a great sentence! 


    Thank you all so much for reading!  I hope you are able to learn as much from Mr. Anderson as I have!!
Best Wishes!

Keeping In Touch With Parents - 2 Easy Ways!

Hi everyone,

This is Valerie from All Students Can Shine.
I'm here to show you 2 amazing online resources that I use to communicate with parents during the year. When it comes to our students' parents, communication is key! The more you stay in contact with them, the better your relationship will be. That being said, I make sure to stay on contact with my parents regularly by sending them pictures (what parent doesn't like seeing pictures of their kids!) and sending them text messages on a regular basis. 


Let's take a look at the pictures first. 

I use a share site called Shutterfly. This website is completely FREE and EASY to use. You can create your own classroom share site in a matter of minutes!


Once your share site it up and running, you can start inviting parents to join the group. Your share site is password protected, which means that only those who are added by you can access it and view the pictures. 
My students' parents really appreciate this feature, for obvious reasons!

There are many different options on the share site. You can add your class list, schedule, your volunteer list, field trip information, etc. The best part is the pictures and videos section! You can easily upload pictures and videos in a matter of seconds. My students' parents really seemed to enjoy it last year. They left comments on their kids' pictures, just like they would on Facebook. It was lots of fun!

This is what the page looks like, before you add any information to it. Parents will only see the items that you add, just like a regular blog. 


Another AWESOME feature is the printing! Parents can view their child's pictures and order prints. How amazing is that?

You can sign up for Shutterfly HERE.


The other way that I stay in touch with parents is by text messaging. No, I do not share my personal phone number with everyone. Instead, I use REMIND. It is a fabulous way to send quick messages to everyone all at once! 
The best part? It is EASY and FREE!

Remind doesn't only work on your phone. They have a great app for phones, but you can also use it on the computer and send your messages from the website. 

There are SO many different ways to use Remind. I use it mostly to remind parents of upcoming events, such as picture day or field trips. I also like to let them know when we do something special in class. This way, they can ask their kids about it at dinner time. They like to get a heads up so they can have a conversation about it that night. For example, in a few weeks I will be sending a message like this one: "Hello parents! Want to know if a pumpkin sinks or floats? Ask your child tonight and you will find out!"
It's just a quick and fun way to get parents involved in their child's school life :)

Here is a list of 25 ways you can use Remind with your class:

Remind has just launched their new stamps feature. you can read all about HERE
You can also get ideas for using this tool effectively on their blog
They post regularly and give really great tips!


How do you stay in touch with your students' parents?
We'd love to hear your ideas so please leave us a comment below!

Later gators,
Valerie


Parent Conference Tips

Hi y'all! This is Casey from Second Grade Math Maniac
Most of us became teachers so that we could work with children. We perform in front of large groups daily, but get sweaty palms when we have to speak in front of people over the age of 12.  


Parent conference time can be really stressful as we attempt to communicate with other adults and not look like idiots. This is particularily true for beginning teachers. Now in year 5, I am still barely comfortable in conferences. However, I've learned a few tricks along the way to help things go more smoothly. 

 Sign Up Genius is a totally free site that I use to organize parent conferences, as well as volunteers and sometimes school meetings. 


I have learned that it is important to make notes ahead of time for every single student. I use the plus/delta system, nothing fancy. This helps me maintain control of the direction of the conversation for those tricky conferences. It also helps to honor to the time of everyone attending, no random tangents for this girl.


One of the most difficult parts of conferences is having parents say things you don't want to hear. As teachers we are constantly reflecting and beating ourselves up about how we can make things better for our students. We spend hours working on engaging lessons and the last thing we want to hear is how we can do more. In my case, my parents are being informed about my teaching methods by 7-8 year olds. This can be frustrating. In all tricky conversations with parents it is important to take a problem solving stance and at all cost avoid becoming defensive. Many times there is a root of truth to whatever the parent is sharing with you. Even if the problem is that the parent is overreacting, it is your job to diffuse the situation as much as you can rather than making it worse with defensive statements. 

You can download some helpful Parent Conference Printables here.


https://drive.google.com/file/d/0B2cwyDqKHOPfTjdvYTlMdngtcjg/edit?usp=sharing


http://www.secondgrademathmaniac.com/