Primary Chalkboard: September 2014

Behavior Tips and Tricks

Hi sweet friends ~ Vicky here from Teaching and Much Moore.  I wanted to share some behavior tips that are easy peasy and seasonal.  Sometimes I think kids need a { pick me up }.  The day to day behavior procedures/consequences are in place but they might need just a little more.  Especially around the holidays or springtime when they get spring fever.


I love using the pumpkin one you see below because parent/teacher conferences are coming up and I have it up in my room.  The parents always comment on how clever or cute the idea is and who wouldn't love that right?!?
 
This is a very simple idea that you can implement in your classroom after a trip to the craft store.  They earn a 'piece' when they are working quietly, engaged/participating, good for a sub or at a special, etc. 
I also thought it would be fun to work on a character trait for a month and add pieces when I see them acting responsible etc. 
Try it out and let us know what you think.  They love seeing the pieces being added and it coming together.  Sometimes they are working so quietly they don't even notice right away if I sneak up and add a piece.  Once we have our creature complete there is some type of reward:  popsicle party, extra recess...you decide!  Have fun with it~  Do you think this is something you would use in your classroom?  For more fun ideas visit me over at my blog too:
 
http://www.teachingandmuchmoore.com/
 
Bye for now xoxox, Vicky
 

Math Exit Tickets and a FREEBIE!


I have recently added the concept of using Exit Slips in my 2nd grade classroom.  I wanted to start off small and try this strategy with math concepts only.  I decided that after I teach the entire unit on a specific skill, I would give my students an Exit Booklet to be adhered into their math interactive notebooks.  This would be a great resource for the students to look back on if they also need to study for a cumulative assessment.

The Exit Ticket/Slip strategy is used to help students process new concepts, reflect on information learned, and express their thoughts about new information.  This strategy requires students to respond to a prompt, problem, skill, or concept given by the teacher and is an easy way incorporate writing into many content areas.  It is a great informal assessment tool that will allow teachers to adapt and differentiate their planning and instruction.

I deliver my math instruction utilizing a Guided Math Approach where I meet with small groups of children to instruct them on a specific skill based on their ability level with the concept.  Before I teach a specific skill, I always pre-assess on the skill to create my guided math groups.  When I conclude my instruction on a specific skill, I will informally assess using a form of Exit Tickets.  

If you would like to learn more about how I do Guided Math, click the image below...


Many Exit Tickets or Slips are quick one-page check-ins to assess whether the student has grasped or mastered the skill that was taught.  I wanted to take it a little further with my Exit Tickets because I wanted to assess my students ability to remember and apply key math terms, practice the skill that was taught and apply this skill in some type of problem solving question or task.

Here is a quick peek at my All About Time Tab-Its!


After my students complete the Tab-Its Exit Ticket, this will allow me to decipher which children need some additional teaching on a the concept and then I can pull those children during guided math to reteach that skill area.

If you would like to give one of my Math Tab-Its a try, click the image below to download my FREE Place Value Math Tab-Its.


If you would like to check out the entire Math Tab-Its Resource, click the image below....


Thanks so much for stopping by The Primary Chalkboard today!
Hugs,
Anna


Classroom Management Legos Style!

Hi all, my name is Emma Farrell and I blog over at Clever Classroom.  I am so excited because this is my first time blogging here at the Primary Chalkboard and the first time ever on a collaborative blog.  I sure am honored to be in such fine company.

Classroom Management Legos Style! Clever Classroom via Primary Chalkboard

I am here to share with you this exciting and very simple classroom management strategy I cooked up. I hope you find it useful. 

It's so simple to implement and your students will love it.

You will need:

1 x legos board
Colored lego rectangles or squares

That's it!

Classroom Management Legos Style!

If you don't have legos, you could use any other construction toys you have like duplo or wooden blocks (the smaller ones).

Each table group (or any other group) will be allocated a color.  If you already use color names for your tables and they don't match your legos, just allocate colors that are close. 

When a table is working towards their goal, on task, helpful, display great manners, working in a team, in pairs or whatever your goal, a student places one piece of lego on the board and each time students add the same colored legos to their tower. 

Classroom Management Legos Style!

The team with the highest legos tower is the winning table/group at the end of the day or week, depending on how you want to implement it. 

Classroom Management Legos Style!

You can even add half bricks instead of a full brick, depending on what you are rewarding. 

It's ideal if you can outline your expectations and social skills at the beginning of the year to revisit them and have them as your success criteria. 

You could also create an anchor chart with your students about expectations of tables or table work.  Use  such frameworks us; students look like, sound like, have. 
Or students at tables; are, have, can, will. 

I hope this helps your classroom management program this year.

Font in images by Kimberly Geswein Fonts

Emma 

Clever Classroom via Primary Chalkboard


Have You Filled a Bucket Today??

Hey everyone! It's Leslie from First Grade and Flip Flops and I'm here to share with you some character... character education! I'll admit... I'm old school. May not look old school but I am a believer in some well behaved children! 

Can I get an amen???

I mean aren't we all??? Have you ever been out in public and you see and hear some children acting foolishly or saying something you know is totally inappropriate  (hoping and praying and knowing, it better not be yours! ha!) and you want to give them the evil teacher stink eye?? 


Let's face it... as teachers, parents, people of a community, we all want to raise a village of nice kids! 


Every year I love to read this book:


It's a great book that talks about these "buckets" that we all carry. When we use nice words or kind gestures, we fill each other's buckets. However, when we use unkind words or gestures, our bucket's get spilled over and are empty. 

The kids were so silent as I read this book and you can see them start to think of their buckets (and their pets! Pets have buckets, too!) and they begin to relate to the kids in the story.

It is really well written and I encourage all teachers to read this for the beginning of the year to help build a strong community in the classroom. There is even a song that goes along with it:


My class loved it. We talked about how to be bucket fillers at home, in school, and in our community. I did a gallery walk and placed posters around the room and had them write how they were bucket fillers:


Their ideas were so thoughtful and heartfelt! I liked the one for their community where they said 'hi" and "bye" to their neighbors! We will use these to help us write our bucket filler slips for each other. 
I have a hanging shoe rack (sorry, I forgot to take a picture) and each student has a bucket (really, it's a cup with their name on it) where they can fill a slip with a bucket filler form when they notice someone doing something kind or saying a kind word, for example. 


Click to download this FREEBIE!!! 


The kids LOVE going to their buckets and reading what others have to say about them. They gush to the other child how they loved reading their note! Plus, it gets them writing!!! I encourage them to write a bucket filler for someone at least once a day and not the same person in the same week. You know how BFF's are! They'd write one every hour. 


I hope that you will incorporate this into your classroom this year if you haven't done it already. It's a great read! And if I may fill your bucket today..... Thank you for being part of our Primary Chalkboard blog! We so appreciate your support and kindness! We strive to bring the best teaching practices, tips, and tricks to you! Hope you all are having a great school year so far!!!

Lots of love to you!
Leslie


Anchor Charts for ELA

Hello everyone! I am so excited to be back again blogging for The Primary Chalkboard! I feel like things are FINALLY becoming manageable again after the Back-to-School season…well, manageable at school. Definitely NOT manageable at home! With a football coaching hubby and 3 kiddos who are involved in after school activities 6 days a week, let's just say I am in dire need of a housekeeping and chef :)

But I digress. Today I wanted to talk about anchor charts. Anchor charts have been around a LONG time, before they had that cute name. I think the beauty of anchor charts is that they help kids remember things after the lesson. They are a constant reminder of past lessons and skills you want students to be able to use successfully and consistently. The problem, though, is that kids have to learn HOW to use these wonderful instructional tools. Simply placing them on the walls doesn't mean a transfer to your kiddos.

Bare Walls Do Not Equal Unprepared
I always start off my school year with pretty bare walls. Yes, it does pain me when I walk by and see beautifully decorated rooms all around me. And I do feel totally unprepared.  BUT, I do know that eventually my walls will be full and just as beautiful. It will just take some time. When I first began teaching, I would put so many charts on the wall that I wanted my kids to refer to, but the problem was that they weren't using the charts. I finally realized that in order to get my kids to USE the charts, we needed to create them TOGETHER. Otherwise the kids really don't have any idea what is on those charts, and what they are supposed to do with the information. And I realized that I could put EXACTLY what my kids needed on those charts. Bonus!

This year I am teaching 6th grade advanced ELA. So, it's really weird to only be focusing on ELA (even though I am pulling in science and social studies topics), but I have also found I am able to put so much more ELA info on my walls, I love it! We have been in school for about 6 weeks now, and my walls are slowly getting decorated. I decided that with my 6th graders, I want THEM to create the anchor charts….which is going very slowly! But I think it will be worth it in the end because they will have a sense of ownership.

Figurative Language Anchor Charts
Our focus the first few weeks of school was figurative language. We spent about 3 weeks learning about the different types of figurative language and practiced revising our writing to include figurative language. I also had my students make this 
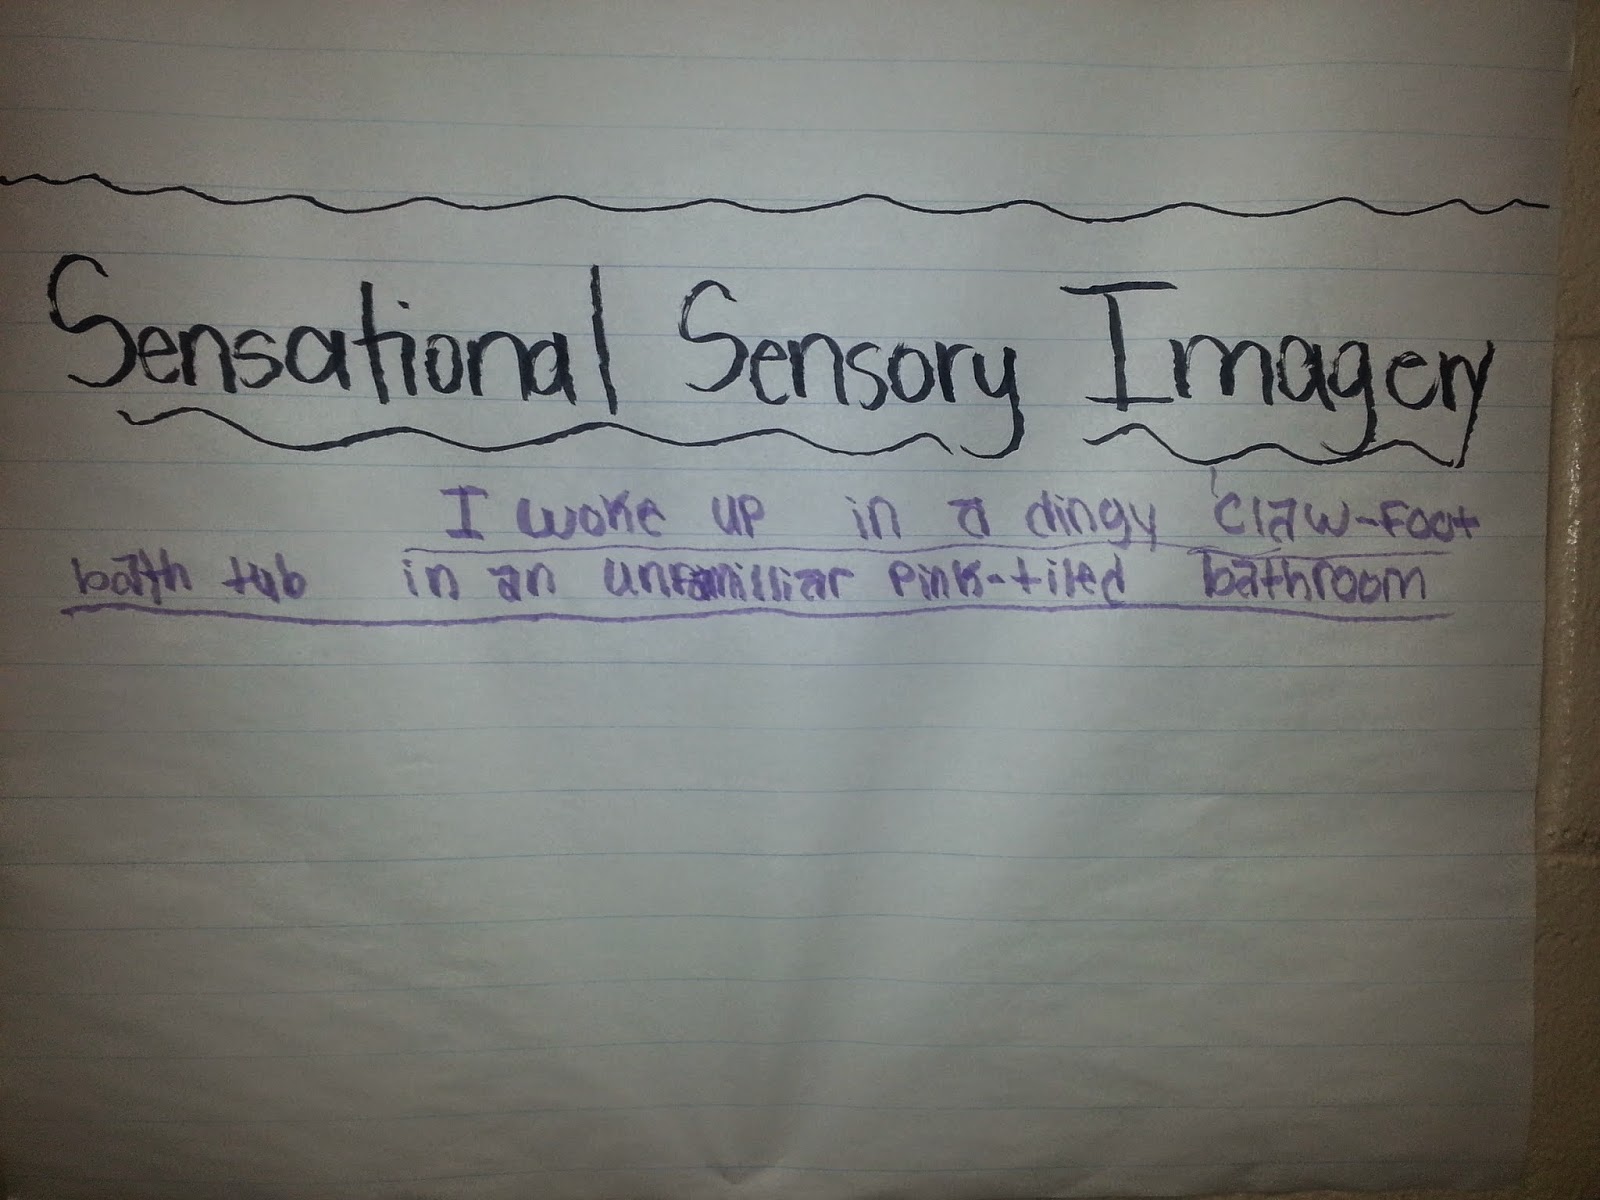
FREEBIE flapbook to put in their writing notebooks so they had a good reminder of each type of figurative language we studied. I also felt like my kiddos needed some visuals on the walls to serve as reminders to include figurative language in their own writing. I always tell my kiddos that one of the few times it's OK to steal is in writing. Not plagiarize, but the best way to improve as a writer is to read and model your own writing after those authors whom you admire and love. So instead of having creating a chart for each type of figurative language and writing examples of that type on it, I decided to leave the anchor charts bare except for the figurative language type.


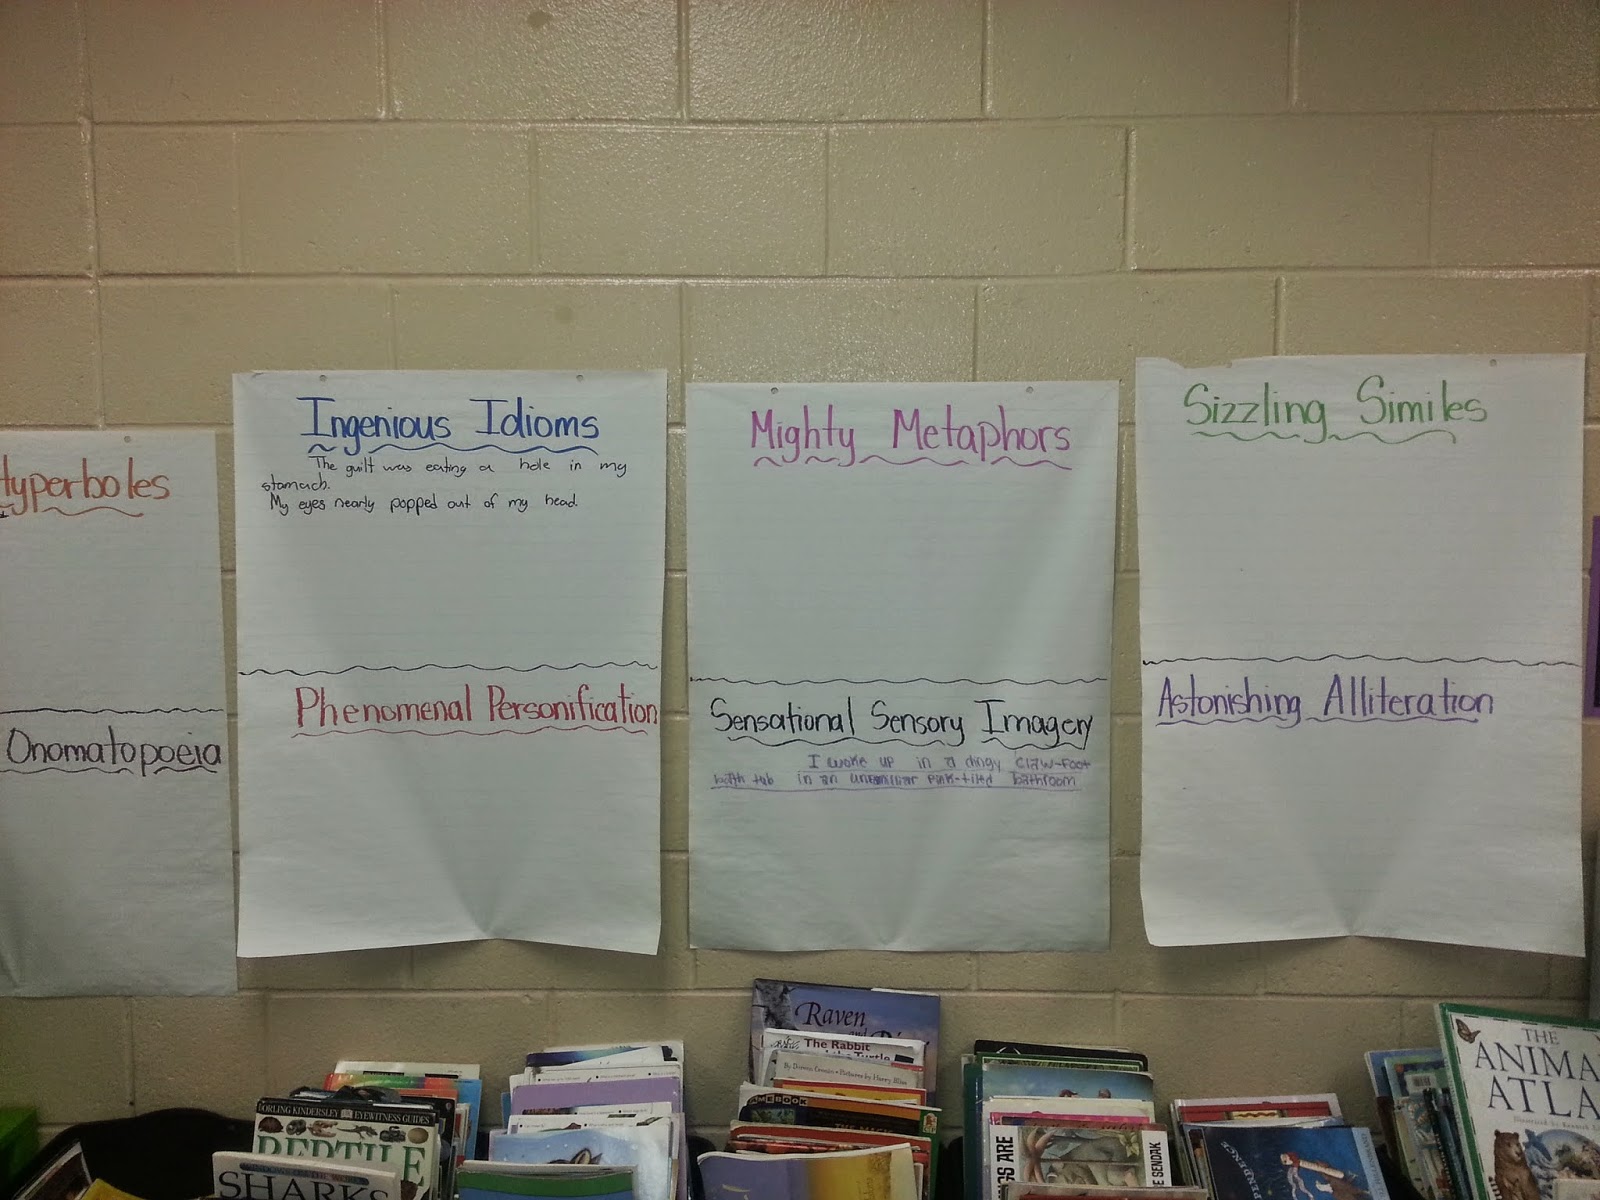
I told my students that whenever they read a text and came across an AMAZING example of figurative language, they needed to write that example on the corresponding chart. This way they have a grab-bag of model sentences they can use in their own writing. They can snag an idea from these charts and tweak them for their own writing. I tell my students all the time that they need to take risks in writing, but usually it's not that they don't want to take a risk. It's just that they don't know HOW. I am hoping these charts will encourage my students to take a risk with using figurative language in their own writing. I will admit, the anchor charts are pretty bare still, but I am hoping that my kiddos will add to them as time passes.


I am also planning on adding an anchor chart for Grabber Leads, too, so that when students read an AMAZING grabber lead, they can write it on the chart. They can then write a similar grabber lead using the examples on the chart, if they need to borrow one. So many anchor charts, so little time!

Thanks for stopping by and reading my post. I would love to hear how you involve students in creating your classroom anchor charts! Until next time, happy teaching!

Heather


SitSpots, Math Facts Show Down, and Lines...OH MY!

      Okay, I have to be honest here- when I first heard about Sit Spots, I didn't think they would have any place in my 6th grade classroom. After all, my kids don't need to be reminded where to sit on the floor, and I didn't want them to be "toys". But, I decided to look at their product line anyways.

     As I browsed the Sit Spots shop looking at their line of products, I found these:


     You might asking yourself "WHAT ARE THOSE?"

     Just the COOLEST lines ever!!! These Sit Spot lines are vivid colors that the students can't miss. The custodian can vacuum over them, and they don't (at least they haven't YET) picked up dirt and mess. They have been down now for 20 days of school and they look brand spankin' new. My 6th grades tromp all over them.
     I placed these four lines where I needed the students to stay in place. Now, when we line up to go down the hall, the number of the day is told to line up on the red line. The other students line up behind. No more peeking in and out of the doorway, or goofing around. My 6th graders know exactly where to be!

     We also do activities at my SMART Board and before my lines, the students would tend to crowd the board. NOW, they don't because they have to stay behind the line or go to the end of it. ha ha. Works like a charm! Here are some examples:


     The blue and green ones that you see in the top picture are my Math Facts Show Down lines. We do math facts show down and that is where the two contenders must stand. For math facts show down, two students stand on the lines and I show them a math fact flash card. First one to say it get to the card and stays on my right (I stand facing the students). The non-winning student goes to the end of the line and the next student in line steps up to the green line. We do this until I run out of cards. The winner stays until he/she loses. At the end, the students count how many cards they have and we cheer!

     I can't tell you how much I love having these lines. I also got several other Sit Spots products that I will be using soon and will share how it goes with those as well.

Sit Spots offers a free sample to see if they will work in your room! WAHOO!
Click HERE to send for your free sample. Totally worth the time.

Thanks for stopping by-
John, Created by MrHughes


To find out more about me and my teaching ideas click below.
Pinterest     Facebook     Blog     Twitter     Instagram    


Differentiation and Engagement Using Math Centers

Aloha!  It's Corinna from Surfin' Through Second.  I just wanted to share a quick post today on how I use Math rotations in my class to meet all the needs of my students and keep them on task.


Our classrooms are filled with a variety of students from all walks of life.  We have our hands full and it's tough to keep all of our students on track and engaged especially during math.

I have set up math rotations in my classroom this year to make sure all students are getting the instruction they need and to make it fun and engaging.


Head over to my blog to see how I have set it up and run my math time in more detail.


Transforming a Simple Writing Lesson: How to Build a Sand Castle freebie

Hi everyone! It's Sarah from Sarah's First Grade Snippets. I've been back at school for two weeks, but this is a post I started working on over the summer. Trying to prolong summer, I guess! :)

Do you want a fun way to introduce or practice procedural writing? Do you want to shake up your writing workshop? Are you tired of kids saying "I don't know what to write"?
If you are nodding your head yes to any of these questions, then take the time to read through this post and watch my two videos!

I had this idea over the summer when my kids were playing in sand every day. My older son was trying to show my younger son how to make a sand castle. Of course my brain immediately went to a writing activity. Now I know sand in the classroom might sound like a total nightmare. But if you could swing it, think of how much fun it would be! PLUS, your kids wouldn't be able to say that they didn't know how to build a sand castle. It's the perfect way to introduce procedural writing. Sometimes you need to shake it up a bit!

There are two ways  you could set this up:

1. Bring actual sand into your classroom. (see option 1)

2. Watch a video of someone (me) showing step by step how to build it and turn it into an oral writing lesson. (see option 2 video)

Option 1: Bringing sand into your classroom: 


Click here or on the picture below to see a video of what this could look like:


Option 2: Bring (virtual) me into your classroom! 

Ha! Again, videoing myself is not exactly my favorite thing, but I do think this would be a good way to introduce a writing lesson. My friend Lisa (and fellow Chalkie) from Growing Firsties gave me this idea to have kids watch the video and then pause to talk about the steps of building the sand castle. If your kids aren't ready to do the actual writing, you could make this an oral writing lesson OR a shared writing lesson. As you watch, you have my permission to giggle at my cheesiness. :) 

Click here or on the picture below to watch the video.


With this option you don't have to bring sand into your classroom. The idea here is that your students can watch me make a sand "castle". As I show them the steps, pause the video to give your students opportunities to talk about the steps of making a sand castle. Then you could decide what your writing assignment will be: oral writing only, shared writing, interactive writing, or independent writing. 


There are 4 page options. You can download the writing pages here:


The big boxes could be for drawings. The little boxes could be for transitional words. The tall one is for more proficient writers to include an opening and closing sentence. 

If you got through this long post and actually watched both videos, thank you! I hope you can use something from this post! Enjoy:)

Come visit me over at my blog: