Primary Chalkboard

Classroom Set-Up - A Look Around My Dream Classroom

Hello, Friends!  It is Autumn from The Primary Techie.  I am super excited to be blogging about one of my favorite places - my classroom.  Here is a very nerdy confession: I LOVE, LOVE, LOVE setting up for the new year!  It is actually one of my favorite parts of being a teacher.  I love the anticipation of the student's reactions, planning how the room will function, and organizing all of my teacher treasures.  Have you started setting up?  I bet every teacher is at least thinking about it.  It is a big job!

I have been in the same first grade classroom for ten years and last year, I did a complete classroom make-over.  Don't anybody tell my husband, but I spent entirely too much of my own money on this project!  The way I see it, I spend more than half my life there.  I want it to be the best it can be for my students and myself.  Some ladies buy Coach purses and Louis Vuitton shoes.  I bought my DREAM CLASSROOM! No regrets!  Here is a look at my room and some of the reasons why I set it up this way.  I hope it gives you some ideas and excitement about setting up your own room.

The Library
Metal door to was used to create book display with magnetic shelves

Above all else, I want my library to be inviting and comfortable.  I also want it to fit lots of kids since reading is such a focus in my little world.  My library is almost one fourth of my classroom.  There is easily room for 3 groups of 4 students during stations.  I have used storage benches that I purchased from Wal-Mart to form one corner.  These create comfy seating and also store seasonal books.  There is a cart for my leveled books and several book baskets full of books we love.  There is a table with listening center activities and a comfy corner for audio books.

The Writing Area

Dry erase board on the back of the cabinets in writing area
Close-up of clear paint cans used to sort supplies
Paint bucket stools store seasonal writing supplies
I added "shelves" to crates by using old dry erase boards.  Perfect fit!

I am a crafter at heart and I think this really influenced my writing area.  I have a round table with paint bucket stools.  Inside of each paint bucket, I have seasonal supplies for the writing area (Halloween stamps, Christmas gift tags, etc.).  I hung milk crates all over one wall to store the writing area materials.  I love this option because I was able to make it exactly right for my needs.  On the other wall in my writing area, I hung clear paint cans filled with art supplies.  Writing center is always a station and my students have a specific task.  On Fridays, we have free choice stations and this area becomes PACKED with kids!  They make the coolest, most creative things.  Although I am a hoarder, I share all my fun goodies with them because I know how much I would have loved this as a kid.  (Let's face it, I still love it now!)  I use the metal door (which leads to my bathroom) to hang a magnetic board.  Here, I write their spelling words or weekly writing task.  I also have turned the back of a cabinet into a dry erase board.  This is a fun way to practice spelling, writing sentences, labeling drawings, and so much more.

Teacher Work Area

One of my favorite drawers.  Can you ever have enough rubber stamps?

At my small charter school, every classroom has a full-time aide.  I KNOW, RIGHT????  It is a pretty cool lil' school.  I never sit down, but I needed a place for my aide to be productive.  I have created my dream work space, but I only get to visit it before and after school.  The rest of the day, my aide uses it.  There is plenty of counter space, a coffee maker, fridge, microwave, and even an ice machine!  I had a custom counter top made to cover the desk.  It is long on one side making a perfect spot for my aide to work one-on-one with students.

Table Groups

Pegboard attached to each table for organizing resources.  
Over-the-door hooks create storage solutions for our backpacks right on their desks!

I have always placed my kids in groups and labeled them by color.  I started acquiring more and more "stuff" that matched my table colors.  This past school year, I added the most exciting piece of all - CHAIRS!  I think they look so good.  My old chairs were mauve and they just really bugged the snot out of me!  My new chairs make my room more colorful and cheerful than ever before!  I love to frequent the home improvement stores for ideas and inspiration.  One day, I walked down the pegboard isle and thought "That looks like something I could use!"  I started trying to figure out how and where in my room pegboard would fit.  My number one need in my classroom is storage and remember all the stuff I acquired that matched my table colors?  I decided the pegboard would fit nicely on the edge of each table and give me a place to keep these colorful treasures.  I measured the end of the table and had my board cut at the store.  (Did you know they do that?  I didn't know until I found the pegboard isle!)  I spray painted my pegboard black and used zip ties to attach it to the table legs.  This also makes the tables more secure so they don't scoot around the room as much.  I used more zip ties to hang the baskets on the pegboard.  Backpacks hang off the other edge of the tables.  I like having them at the desks so that transitions go quickly.  I found these over-the-door hooks at the dollar store (2 per package).

Extra Storage

Close-up of clear paint can storage
Working pay phone!  My absolute favorite!

I have A LOT of stuff in my room and I really needed storage solutions.  I purchased bookshelves from Target last summer and they have helped so much.  I love the uniform look and the contrast of the black with all the bright colors I have used in my room.  I used clear paint cans to store supplies on the shelves.  I wanted a small counter on the end.  It seems like I am always walking in my room with something that I need to put down quickly and this gives me a place to do that.  There was a piece of leftover counter top that fit perfectly.  I also replaced my school phone with this pay phone!  It is SO much fun!  It really takes money, although you don't have to put money in to make a call.  It has a great ring, too.

Thanks for letting me share my room with you.  I would LOVE it if you would share pictures of your room with me, too.  Click here to head over to The Primary Chalkboard's Facebook page and share your pictures.

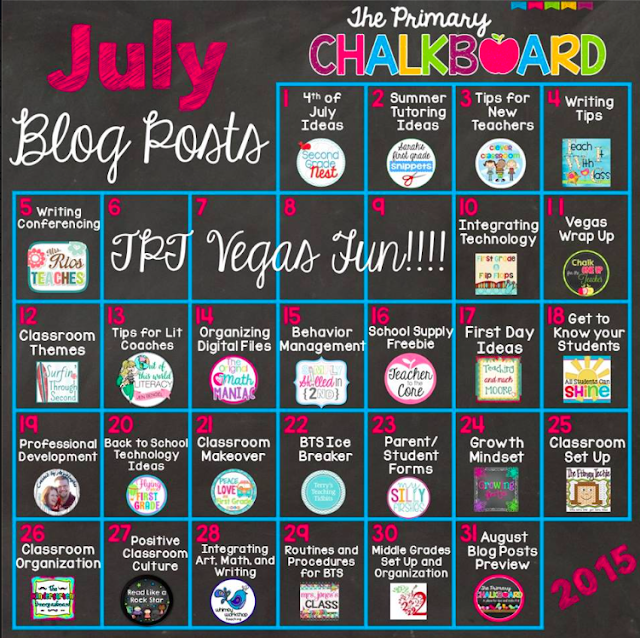
The Chalkies are busy bloggin' every day this month!  Here is a peek at what we have got planned:


Growth Mindset

Hi There!
Lisa here, from Growing Firsties & I'm going to share a little bit about Growth Mindset today, which is based on Stanford University psychologist Carol Dweck's work.

Heads up that I do have some Amazon Affiliate links in this post. Should you choose to use the links, I'll earn some "circle money" as my daughter calls coins. :-) Half of my affiliate proceeds are for paying it forward - each month I receive earnings I give to my local food pantry/outreach services organization. The other half is spent on books and items for my classroom.
Growing Firsties Primary Chalkboard

With a growth mindset, people believe that through effort and practice, they can develop and improve their talents and abilities. In a fixed mindset, people believe that their talents and abilities are fixed...and that it's talent (not effort) that creates success. Woah.

Years ago, I first began to think about mindset in terms of working with struggling students...those students where the learning is hard. Students, who, if they don't have the mindset to keep trying, will give up. Then what will they learn?

My thinking expanded as I witnessed students labelled as gifted hitting a struggle academically and not knowing how to handle the struggle when they are unfamiliar with the resilience and effort needed.

Then I realized that mindset, resilience & perseverance are critical for all of us. Regardless of age. #helloIhatecardio #gottadoitanyways

You may have seen this Growing Firsties post from a few years ago, containing this freebie download.
Everyone Matters!

Or maybe this post from last summer all about perseverance.
What's Under Your Cape?

I am blessed to work at an amazing school! Some talented colleagues ran a book study on Dweck's Mindset book this year and it was such fun to re-read and discuss mindset with like-minded teachers! I also added Mindsets in the Classroom (by Mary Cay Ricci) to my collection.

We read aloud some great books and I expanded my collection beyond the wonderful texts from Peter H. Reynolds (Ish, The Dot, Going Places...)


One of my teammates asked me if I had a printable for our work on mindset and that gave me the motivation to put my swirling thoughts to work....Here's a little peek at the inside...


Scroll down to download this freebie! :)

You might be interested in reading an article by the always eloquently-thought-provoking Alfie Kohn "The Perils of Growth Mindset" education. You can get to it {right here}.

Carol Dweck, author of Mindset, has written this EXCELLENT article...you'll definitely want to check it out! You can get to it {right here}.

I have a Pinterest board called Mindset and I love pinning to it! You can check it out by clicking here or the screen shot below. You should really check out the Famous Failures video! It's amazing!
Growing Firsties

We'd love to hear what you do to help build a growth mindset with your learners!


How I Organize Back to School Forms

Hi everyone! It's Haley from My Silly Firsties. I can't believe we are already thinking and talking about Back to School forms! It feels like we were just gearing up for Summer! 

I know that so many of us make resolutions each school year, and for me, they almost always center around organization. I am just not organized, hahaha. It will never be my strength, BUT I have found some easy ways to manage paperwork at school. I have found that using binders and folders keeps me sane and makes organization way easier. 

During the first week of school, I think almost everyone sends home a Parent/Student Information Sheet. Our school collects this information, but it can be hard to access, and I like to have something tailor-made to my class. So, I usually send my own form home and HOPE they all come back, haha! I have a few tips on keeping these forms organized! :) 


First, it's super important that you find a form that is perfect for your class and will actually be USEFUL to you! You can find lots of editable forms on TPT and teacher blogs! I make sure to give parents the opportunity to write about their child...it helps so much if I can understand how they view their child's strengths and weaknesses! 


I send home a double-sided page, but I actually think it's better to send 2 separate forms. I have found that parents don't always fill out the back, but they will almost always realize there are 2 sheets. 


Here's an example of the forms I send home each year. 


After I have collected the forms, I keep them in a safe place. In the past, I have hole-punched them and kept them in a binder, but I found these adorable folders at Target and thought they would be perfect for keeping forms in that I don't need to access everyday.


Since I don't like to pull these out everyday, I keep all the information for my whole class on a few little cheat sheets. Those would definitely go in my binder so they are always at my fingertips!


Here are examples of these forms! 


I also found this fabulous FREE form to send home by sweet Lisa


Thanks for stopping by! :) I'd love to hear how your organize your forms! 

Back to School Ice Breaker Activity

Hey everybody!  This is Terry from Terry's Teaching Tidbits.  I don't know about you, but I only have one week left of summer vacation and then it's back to the classroom for another year of teaching 5th graders.

As a 5th grade teacher, it's very important to get your students' attention on the first day of school and amp them up for a fantastic year, especially because in my school it's the last year of their elementary career.  To do this, I have a great ice breaker activity that I like to do with my class; it's one that I did back when I did musical theatre as a kid in order to become more comfortable with our castmates.

On the very FIRST and very LAST day of school, I do this same activity.  I even tell my students this when we get started.  I have everyone arrange their desks in a huge circle and we each get a piece of lined paper and a writing utensil.  Everyone writes their name on the very top of the paper.  When everyone is ready, I say "pass" and we pass the paper to the left.  Whatever name is on the paper that is in front of you, you have to write one positive thing about that person.  Once everybody has written on the paper in front of them, I say "pass" and we once again pass to the left.  A few important things during this activity - everyone is quiet and everyone must write something and it can only be positive.

After a lot of passing, the activity is over when you receive the paper back that has your name on the top.  When you get it, you read all of the wonderful things that everybody had to say about you.  I have my students put it somewhere special and safe where they can pull it out at any time if they are having a bad day.  I usually suggest their pencil pouch.  I keep mine in my desk.  I know have 5 years worth of first day and last day papers of compliments and I still love reading them to this day.

The reason I have my students do this activity on both the first and last day is because it's amazing how much the comments change in that time.  They go from being more superficial comments such as "I like your hair" to, "you really made me laugh all year long".  The comments become more personal, and they are definitely more meaningful on the page that I receive back with my name on it.   This activity can be just as important for us as teachers as it can be for our students.  My students are usually harassing me by the last week of school about when we're going to do the activity from the first day.

For those of you who have students in upper grades, I definitely recommend this activity.  It's a fantastic way to boost every student's self esteem on the first day, allow them to get to know their classmates, and to especially make any new students in the class feel welcome.  I've only seen positive results with this and I hope that you can use it in your classroom.

Here's to a great new school year!


10 Things to Do BEFORE You Set Up Your Classroom

Hey, there, friends! It's Laura from Peace, Love, and First Grade!

If it's summer vacation for you, enjoy! 
If not, live each day to the fullest and smile because it happened!

I'm here today to talk about getting your classroom ready for a makeover. 
Now, this is NOT my classroom reveal. 
That will come as I have time to get in my room. 
I'm excited to share that with you on my blog later this month!
Today is all about getting ready to set up your room!

Let me preface this by saying, 
I'm not trying to pressure anyone into decoration madness,
but I do believe a happy classroom is one that functions efficiently,
 and is well organized and attractive. 

This summer I read The Life-Changing Magic of Tidying Up by Marie Kondo. 
Marie is a proponent of getting your house in order and keeping it in order. 
She suggests keeping only the items in your home that bring you joy and letting go of the rest.

I think we can apply the same principle to the classroom. 
Keep what sparks joy in you and let go of the rest.

ARE YOU READY TO SEE MY MESS? 
Here you go!
Want more? 
The good news is...it doesn't look that this anymore!
So, are you ready to get your classroom in order?


Great! But remember-this is not a one day job.
I like to think of it as ten days.
Already started school?
Take one task a week for the first ten weeks.


Day 1) Clean out your children's literature. 
Keep only the books that bring you and your kiddos joy!
I know. 
I LOVE children's books, too, but let's face it. 

Not all books are created equally. 
It's okay to let go of a book. 
DON'T THROW IT OUT. 
Pass it on to someone who will find joy in it.

You'll be amazed at how much room this gives you AND you'll know what you have when you need something.

Day 2) Clean out your Math manipulatives! 
You don't need 6 bins of pattern blocks or 48 Judy clocks.
Keep what you need and pass the rest on to someone else. 
It's okay.

Day 3) Clean out your art supplies. 
If you haven't used those foam Easter bunnies in the last 3 years, get rid of them. 
Pass on the joy to someone else! No hoarding!

Day 4) Clean out your office supplies. 
Look at each one. 
If no joy comes from having them and they serve no purpose, 
pass them on to someone else or donate them. 
It's a good feeling!

Day 5) Clean out board games, puzzles, and other activities. 
If you don't use them, someone else can. 
If Czechoslovakia is still on your globe...you get it.
Share your treasures.

Day 6) Do I dare say it...Clean out your paper. 
Oh, it's tough! I know it is. I've done it. But the feeling is just so great! 
If you haven't used it or it turns your fingers purple...you don't need it.
Recycle that paper!

Day 7) Decide how you will store supplies.
Once you decide what manipulatives and supplies you are going to keep, choose how you are going to store them. 
Then label your supplies. 
Labeling makes supplies easier to find for students and other adults who may visit. 

NOW-
The next two may not be popular, but I'm going with them.

Day 8) Get rid of your filing cabinet OR scale down to a smaller one.
The more room you have for stuff, the more stuff you'll acquire.
If there's no where to put the stuff, you won't be as likely to hold onto it.

Day 9) Get rid of your teacher desk OR scale down to a smaller one.
You can do it! I did and I had a lot of stuff in mine, too.
I never sat there (not even after school), and it took up a great deal of space. 
Now, that space is used by my first graders, and I don't miss my desk one bit!
I use an over-the-door shoe organizer for my office supplies. 
Space saver!

Day 10) Plan your classroom design.
Once the clutter is removed and you are ready to set up your room,
 go online and play around with a classroom set-up tool. 
You can design your whole room as many times as you like.
You'll need your room measurements for this.

Here are a few good ones:


This is the one I use. 


Now you are ready to think decor! 

Let me tell you, if I can do it, you can do it?
Did you see my mess above?
It doesn't look like that anymore.

This week, I can get in my building to work and I plan to make the most of it. 
Pics to come on my blog!
Happy Tuesday!!


Don't forget! We're blogging every day this month at Primary Chalkboard! 


Back to School IPAD Apps

Hi everyone!
 
Its Latoya over at Flying into First Grade !!!
 
I am here to share with you some apps that could be useful for the beginning of the year but also throughout the year.


I had the honor of attending a SEE math conference for 2 weeks this summer.  They gave us so many resources and manipulatives.  The best gift was the free IPAD I received during the training.  We learned aboiut many apps that can be used in the classroom.  You will find my favorite 4 apps that I learned below!!!
 

Here is a quick example I found on youtube!


Here is a quick example I made!!!


Here is an example that I created in the training.


Here is just a quick example I did last night.


Now Im off to go pack up my classroom so I can move!!!!


Getting the Most Out of Professional Development


You hear it announced at the beginning of the school day and you dread it ALL. DAY. LONG! Or, you are happily enjoying your summer break and you get an email or text that makes your heart drop... PROFESSIONAL DEVELOPMENT SESSION- attendance "optional", but not really, if you know what I mean.

Yup, we have all been there before. I will admit that in my 15 years of being in the world of education, I have sat through some pretty crumby professional development sessions/classes where I felt I knew more about the topic being presented than the presenter. I was grouchy and didn't want to listen or hear what was being discussed!

On the flip-side of that, I too, have sat through many AMAZING sessions of professional development where I left inspired, invigorated, and ready to get the proverbial party started!

I have spent the past couple of weeks reflecting on this topic. I am now an administrator who will be giving these professional development opportunities to my staff. What made some sessions so amazing, and others so lame?

I realized it was ME! It dawned on me that I played a HUGE role in the value I got out of those professional development sessions. I also realized that there were some key components to getting the most out of each and every session- regardless of the topic, the presenter, or the time of day!

So, read on, dear PD'er! I am excited to share a few of these tips with you!

1) Have A Positive Attitude
No I am not just saying this because I am a new principal. I have been a negative Ned most of my life. I tend to be very pessimistic about many things.  However, I found that when I had a positive attitude, even if I had to "pretend" I was glad about the PD session, that I was more attentive and willing to listen to what was being shared. I tried to smile more in the session and remind myself that something in this presentation WILL make me a better teacher!

Also, be sure to avoid or shut down negative talk about professional development. A simple, "Really? I am looking forward to our meeting today!" is usually enough to get the negative Nellys and Neds to zip it!


2) Get AND Use A PD Notebook/Journal
I learned the value of this from my second principal- Jane Friel. She was a ROCK STAR at modeling for us as teachers things to do and try in our classrooms during PD sessions and Faculty meetings. Each year we would get a new composition notebook that had our name, grade, and year on it. Sometimes were "required" to take notes or reflect on the the learning of the meeting, but mostly it was a place to write down key ideas and take-away points from articles/presentations that were part of the on-going PD at that school. I still have all THREE of the ones I received while working in her school. Even better, I still flip through them from time to time and find the learning still relevant to me today!

I found that when I listened with the foreknowledge of wanting to write down the key ideas, I was able to focus and truly listen. It made a HUGE difference in my learning and understanding.


3) Have A Discussion ASAP!
I have found that when I sit down, whether it is later that day or the next, with a colleague that also attended (or even one that didn't) and discuss key points, that I am able to better retain the information, get new insights from the person I am sharing with, and have a more positive experience overall. In fact, knowing that I will be sharing with someone else, makes me take better notes and ponder about ideas.

However, note that sitting next to your besties and talking off-topic the whole time will NOT be a helpful activity. Side-conversation is distracting to others around you and a real downer for the person presenting. To top it all off, it makes you look unprofessional as well- something we ALL want to avoid!

If no one wants to listen to you when it is all said and done, then write a Facebook post, blog post, share your ideas on Instagram, or even do a quick Periscope video- someone out there will listen and respond! I know I would!


GET REAL MR. HUGHES....
So, I want to make it clear that I understand that some professional development will just suck eggs. That's all there is to it! Sometimes the required topics are annoying- or "just another thing" we have to do. But, if we refer to Tip #1, we will find that regardless of the topic- something useful, positive, and constructive can truly come from ANY training, in-service, or session you are required to attend.

And, if the offering is optional- make it a point to go. Knowing you are there because you CAN be and not because you HAVE to be, will also make a huge difference in your attitude and learning.

Now that I have shared my TOP 3 TIPS for GETTING THE MOST OUT OF PROFESSIONAL DEVELOPMENT with you- it's YOUR turn! I would love to hear what tips you have to offer about how to get the most out of professional development! Leave your thoughts in the comment section below! I can't wait to hear from you! SCORE!

Thanks for stopping by and have a wonderful WEEK! WAHOO!

YOU ROCK-
John, Created by MrHughes


Join me on my journey with one or all of these sites:

Pinterest     Facebook     Blog     Twitter     Instagram    
Periscope (@createdbymrhughes)


Don't miss the other AWESOME posts from this month. 
Click on the picture to learn and read more! WAHOO!